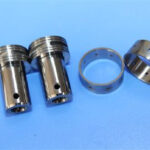
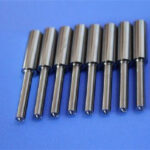
According to statistics, the consumption of molds in my country’s machinery processing industry alone is as high as five times the total price of machine tools each year. It can be seen that the large consumption of molds not only directly increases the production cost, but also causes frequent shutdowns of a large number of production lines due to frequent mold replacement, resulting in greater economic losses. Mold repair technology undoubtedly strengthens the life of the wire drawing die, and has good economic benefits. It can be used to strengthen and repair the surface of various metal material molds and workpieces such as various iron-based alloys and greatly increase the service life.
What we need to pay attention to here is: Although the machine will give an alarm when the operation is wrong, it may occasionally burn pits on the surface of the mold! Therefore, it is necessary to clarify the specific steps of wire drawing die repair:
- Cleaning: Simple cleaning to remove oil and impurities at the place that needs to be repaired, otherwise there will be poor power supply and sparks during the repair process.
- Rolling rate: The rotation speed of the welding gun should be closely arranged with the pulse output current to form fusion points on the patch. The rotation speed should not be too fast, otherwise there will be a small amount of patch peeling and small pores after the repair and polishing.
- Contact point of welding torch and mold: the smaller the contact area between the welding torch and the repairing material, the better the pressing, the greater the current density (the more concentrated the current) passes, the greater the heat of the welding point, and the greater the degree of combination of the repairing material it is good. The power data shown in the repair material shell is the power requirement when the φ5mm standard welding gun electrode rod is in contact with the plane repair material. The larger the contact area of the welding head with the same power is, the current is dispersed, and the repair effect is not ideal. On the contrary, if the contact area is too small, repair In the process, it is easy to cause melting and splashing of the repair material and uneven surface.
- Posture and pressure: When repairing, the welding torch should be at 45 degrees to the mold surface, and a certain pressure should be applied to the welding torch. The pressure depends on the roughness of the defect surface. It is not smooth and has more impurities. The surface should be more forceful.
- Complex cavity: Use precision power when repairing fine, multi-edge, and complex surfaces. It is better to repair thin carbide dies materials for multiple times. The normal state is suitable for large defects.
- Oxidized surface repairProcess: clean up impurities—>remove the oxide layer—>repair the edges with low power—>fill in—>polishing;
1) Before repairing the oxide mold, the nitride layer must be removed with a power tool, and the repair material must be directly welded to the steel substrate, otherwise there will be an oxide layer between the repair material and the substrate, which is easy to peel off.
2) Try to use low power and thin materials to repair the edge part, which can reduce and reduce the edge marks caused by the repairing heat. - After the repair point is polished, there are light protrusions on the outer ring. The reason is that the heat generated during the repair will harden the workpiece. The material with good quenching characteristics is especially obvious. The edge part is repaired with low power and thin materials to avoid this phenomenon (method (Refer to oxidation mold repair).
- After repairing and polishing the concave, the reason is that the hardness of the material is lower than that of the base material. It can be avoided if the hardness of the material is similar to that of the base material.
Link to this article:The specific steps of drawing die repair
Reprint Statement: If there are no special instructions, all articles on this site are original. Please indicate the source for reprinting:Tungusten,Thanks!^^


