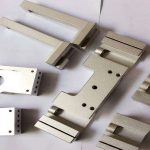
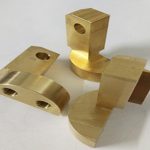
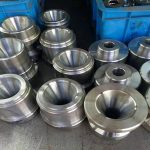
Although the design of the part may meet all the correct functional requirements, it does not mean that the design is suitable for cost-effective CNC machining. In fact, some part features may be difficult or even impossible to process as designed, which will affect cost, quality and yield issues.
The use of design for manufacturability (DFM) practices can identify some key drivers of processing time and cost:
Tolerance .
It is easy to specify dimensional tolerances that are too strict, which increases production time, reduces output, and increases costs.
Feature size .
You need to ensure that your part features can be manufactured using standard tools rather than custom tools.
Surface treatment . Designing parts with a finer surface finish than you need will result in costly and inefficient CNC production.
Radius, chamfer, cross hole and deburring .
The way the edge of the part breaks around the hole and other features will affect the cost-making part radius, chamfers and cross holes important variables to consider in the design process.
contour.
Just because a part can have many contours does not mean it should. Simplify parts so that they can be manufactured on three-axis machines instead of five-axis machines, so you can put money back in your pockets during the production process.
Inspection of. It is worthwhile to adjust the part design to facilitate the inspection process-making this variable an important but subtle part of the design process.
Dimensional tolerance
If it is too tight, tolerances can easily extend the production time, leading you to enter more costly processing areas and reduce output. This is why it is always a good idea to ask yourself whether a part really needs the strictest tolerances from a functional point of view. If the part does, then we have the ability to handle the most demanding tolerances. But if not, then relaxing tolerances where appropriate can significantly improve the machinability of parts in terms of time and cost.
Tolerance refers to the acceptable amount of dimensional change that will still allow the object to function normally.
They can be applied to the nature of the shape of the part, whether it is a plane, a straight line or a circle, and it can also be applied to the position, whether it is symmetry or concentricity. Other types of tolerances include feature orientation, contour, and runout.
The disadvantages of tight tolerances boil down to time and cost. For example, under a certain size threshold, the hole size will require custom or special tools, thereby increasing costs. Or, the machining shop may have to switch from machining to electrical discharge machining (EDM), fixture drilling, or water jet cutting to achieve the most stringent hole size specifications, increasing time and skilled labor costs.
Even if the tolerances are effective, the manufacturing process itself will present challenges, leading to low yields and additional costs. It is not uncommon for machined parts to meet tolerances in warm workshops, but seeing colder temperatures during inspections can cause parts to exceed tolerances.
Real example
An example of a part with too tight tolerances is the spider bag, which is part of the control assembly of the nuclear power plant rod group. The assembly consists of 24 legs, each with a hole with a dimensional tolerance of 0.280 inches (plus or minus one thousandth). In order to put these numbers in perspective, the spider bag must contain a tolerance that is eight times tighter than a human hair.
Even if a tolerance deviates by a tenth of an inch, the part must be scrapped. Even more challenging is that the spider bag consists of 24 holes, resulting in a very high scrap rate and inconsistent delivery times-both of which significantly increase manufacturing costs.
On the aerospace components that will be sent to the moon, the task is to reduce weight by cutting pockets with a tolerance of plus or minus 5 millimeters. These pockets have no other functional purpose other than reducing the weight of the overall part, which begs the question: Why pay more for such tight tolerances?
It is always a good idea to consider whether the tolerances of the parts need to be so tight. If resolved in the initial design stage, many off-line manufacturing problems related to tolerances can be easily avoided. In many cases, re-engineering a part once it has entered the workshop will prove to be a costly endeavor.
Avoid custom cutting tools
Adjusting tolerances is just one of many ways to fine-tune part design for efficient machining. A related manufacturability issue is related to the design dimensions that require the use of custom-sized end mills and other cutting tool features. Holes, grooves, radii, and chamfers are all examples of part features. If the dimension of the feature does not match the standard size tool, expensive custom cutting tools may be required.
The nearest part has a radius of 0.18 inches, but the radius of a standard three-eighth inch end mill is 0.1875. From a functional point of view, are these 0.0075 inches important enough to trigger the additional cost and delivery time of custom end mills?
In another example, you need to order a part with a 0.188 inch fillet radius to be able to cut a depth of 1.900 with a 0.375 diameter tool. This radius will not interfere with any holes or other functional characteristics, but it takes several slow and gradually lower cuts to reach this depth. After repeated discussions with the design engineer of the part, the radius was increased to 0.260 inches, which allowed the use of 0.500 end mills to the full depth, with almost no pushdown, and shortened the time by one-third-saving customers cost and lead time. tool.
Why engineers need to customize?
So why is there an unusual size? In some cases, the culprit is the mentality of “full copy”, bringing the dimensions of early castings or prototypes into the production drawings. At other times, it is the metric transformation that calls the characteristic dimension. Standard cutting tools come in metric sizes, not just American imperial sizes. In these cases, it is worthwhile to provide the machine shop with original metric size drawings, rather than wasting time and effort to convert the labeling into something that may not meet the standard U.S. tool size.
The consequences of calling out feature dimensions that are not suitable for standard cutting tools can be serious. Some of these costs are the price of the cutting tool itself, and custom-sized tools tend to break and wear prematurely, which may exacerbate this situation. Then there is the opportunity cost associated with obtaining a longer lead time for the part.
Special feature sizes also have a hidden cost, which may not be obvious: Features machined with standard cutting tools can usually be inspected with simple gauge pins and similar inspection tools. Features produced with non-standard tools may need to go to a coordinate measuring machine, thereby increasing production costs and delivery time.
If the part has features that require a custom tool to meet the functional requirements, we can make anything you want to put on the drawing. But it is worth studying whether there are features that can simplify the size to match standard tools without interfering with the function of the part in the early stages of the design process.
Surface treatment: balancing behavior
A diagram of what some surface treatments might look like. Average roughness (Ra) and root mean square (RMS) are common representations of surface roughness, but each is calculated differently.
Obviously, over-specifying certain part features (such as dimensional tolerances, grooves, holes, and radii) will increase production time and cost, but surface finish may be another matter. Although designing parts with a finer surface finish than required does cause Cnc Machining to be inefficient and costly, the opposite happens more often.
Our experience at L&S Machine Company is that the surface finish specified on the drawing does not always reflect customer needs. For example, a Ra surface finish of 125 microinches looks smooth to the naked eye, while a Ra surface finish of 250 microinches appears rougher. Whether for aesthetic or functional reasons, customers will come back because they want a smoother surface.
Although 250 may be shown in the figure, what the customer really wants and expects is 125 or smoother. This is especially true for part features such as water holes. In many cases, this back and forth will extend the production time.
On the other hand, it is important to remember that the finer the surface finish, the more labor required to achieve it. Therefore, over-specifying finishes will also increase time and cost. For example, although it is easy to achieve a surface finish of 125-250 using water jet and CNC milling, to obtain a smoother surface will require more professional tools or workbench work, resulting in a significant increase in cost.
Link to this article: Fine-tuning the part design saves time and cost, what should I pay attention to?
Reprint Statement: If there are no special instructions, all articles on this site are original. Please indicate the source for reprinting:https://www.cncmachiningptj.com/,thanks!
 3, 4 and 5-axis precision CNC machining services for aluminum machining, beryllium, carbon steel, magnesium, titanium machining, Inconel, platinum, superalloy, acetal, polycarbonate, fiberglass, graphite and wood. Capable of machining parts up to 98 in. turning dia. and +/-0.001 in. straightness tolerance. Processes include milling, turning, drilling, boring, threading, tapping, forming, knurling, counterboring, countersinking, reaming and laser cutting. Secondary services such as assembly, centerless grinding, heat treating, plating and welding. Prototype and low to high volume production offered with maximum 50,000 units. Suitable for fluid power, pneumatics, hydraulics and valve applications. Serves the aerospace, aircraft, military, medical and defense industries.PTJ will strategize with you to provide the most cost-effective services to help you reach your target,Welcome to Contact us ( [email protected] ) directly for your new project.
Link to this article:Fine-tuning the part design saves time and cost, what should I pay attention to?
Reprint Statement: If there are no special instructions, all articles on this site are original. Please indicate the source for reprinting:Tungusten,Thanks!^^

