The flash of a part can occur due to a variety of reasons, from process or material changes to tooling failures. Along the parting line of the mold or wherever the metal forms the boundary of the part, there will be burrs on the edge of the part.
Tools are often the culprit, so identifying the type of flash being acquired and when it occurred can point you in the right direction.
tool
The common first reaction to reduce flash is to slow down the injection speed. Reducing the injection speed can eliminate burrs by increasing the viscosity of the material, but it also increases the cycle time, which still cannot solve the initial cause of burrs. To make matters worse, there may be flashes again during the packing/holding phase.
Flash may occur during filling (first injection stage) or packaging/storage (second stage). Flash may occur for both conventional parts and thin-walled parts. Discovering at which stage the flash occurs helps reduce the complexity of determining the cause. A simple test is to reduce the second stage (packaging/holding) pressure to the lowest pressure allowed by the machine, which should be lower than the plastic pressure of 500 psi. The goal is to see the effect of only filling the cavity. The first stage of injection fills 92% to 99.9% of the part, but this stage must end before the cavity is filled. At the minimum pressure level of the second stage, it is easy to check whether the part is a short shot at the end of the first stage of injection. If there is flash on the short lens, we can concentrate on affecting the parameters that affect the first stage of injection.
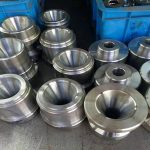
Proper mold cleaning may be the solution to burrs
Remember that for thin-walled parts, even a short shot may generate enough pressure to blow the fixture away. However, if you see flashes in parts with similar wall thickness after a short shot in the first stage, the most likely cause is that the parting lines in the tool do not match. Remove all plastic, dust, or contaminants that may prevent the mold from closing properly. Check the mold, especially if there are plastic chips behind the sliding mold and in the guide pin cavity. After such finishing, if there are still flashes, please use pressure sensitive paper to check whether the parting line does not match, which can show whether the mold is evenly clamped along the parting line. Suitable pressure sensitive paper is rated at 1400 to 7000 psi or 7000 to 18,000 psi.
In multi-cavity or household molds, flash is usually caused by an improper balance of melt flow. This is why in the same injection process, multi-cavity molds may see flash in one cavity and dents in the other cavity.
Insufficient mold support can also cause flash. The molder should consider whether the machine is equipped with enough support columns for the cavity and core plate in the correct position.
The sprue bushing is another possible source of flicker. The contact force of the nozzle ranges from 5 to 15 tons. If the thermal expansion causes the bushing to “grow” to a sufficient distance from the parting line, the contact force of the nozzle may be sufficient to push the moving side of the mold in an attempt to open it. For non-gate parts, the molder should check the length of the gate bushing when it gets hot.
Flash memory: causes and remedies
The parting line is not matched or the mold is damaged: clean the mold surface and the back of the slider, and check whether there are any obstacles in the cavity to ensure correct clamping. Also check whether the fixture is misaligned, whether the tool is damaged, whether the tie rod is stretched unevenly, or whether the machine level adjustment is appropriate. When the tool is in the press, use pressure sensitive paper to check the pressure on the parting line in the overflow area and the non-overflow area.
Improper mold support: Check the number, position and length of the support pillars in the mold.
Uneven flow in multi-cavity tools: Use Beaumont “5-step process” to check mold balance.
Clamp tonnage is too low: reduce packaging/holding pressure. Use a press with greater clamping force.
Clamp pressure is too high: reduce the clamping tonnage.
The sprue bushing is too long: For non-gated parts, check the thermal expansion of the sprue bushing under production conditions. A shorter bushing may be required.
Overflow cavity in the first stage injection process: adjust the cut-off position of the first stage or reduce the shooting size. Also check the response of the machine from the filling phase to the packaging/holding phase.
Viscosity is too low: Test the melt temperature to confirm that it does not exceed the limit recommended by the supplier. Check the melt flow rate before and after molding for signs of degradation. Minimize the melt residence time. If the resin is hygroscopic, check the moisture content. Try different kinds of resins. As a last resort, reduce the injection speed.

Clamp problem
Next, let us study clamping. If the flash is concentrated in the center of the mold, it may be caused by too high clamping pressure. If a smaller mold is mounted on a larger platen, the force of the mold at the four outer corners may be greater than the force at the center. Excessive clamping pressure may cause the template to press around the mold. To solve this problem, make sure that the mold occupies approximately 70% of the distance between the tie rods.
Too little clamping tonnage may also cause flash. If the part passes the first stage of the short-term test without flash, it means that the packaging/holding stage may push the parting line away. The solution is to increase the clamping tonnage. This is especially true for high-speed filling in thin-wall applications, where 35,000 to 60,000 psi of plastic pressure may be required in the nozzle.
Misaligned clamps can cause flashing. It may be caused by the machine being not level, which is easy to check and repair. Check if there is insufficient clamping parallelism (which also produces flicker), more work is needed. Low-cost solutions include using standard square fixtures and measuring the stretch of the tie rod (the change should not exceed 0.002 inches). A better but more expensive approach is to use a newer laser method to check for parallelism.
Process-related issues
If the material viscosity is too low, it may cause flickering. Resins can become “flowing” for a variety of reasons: the melt temperature is too high, the residence time is too long and cause degradation, improper drying leads to the presence of moisture (which also degrades some resins) or contains too much lubricant Colorant. You can use a thermal probe or infrared sensor to get the melt temperature at the nozzle. Checking the melt flow rate before and after molding may indicate whether it is the cause of material degradation. For unfilled resins, a 30% change in melt flow rate is acceptable, while a 40% or more change is not allowed. However, for filled resins, an increase in melt flow of 40% or more is acceptable. An instrument can also be used to check the moisture content of the resin.
Link to this article:Proper mold cleaning may be an effective way to solve burrs
Reprint Statement: If there are no special instructions, all articles on this site are original. Please indicate the source for reprinting:https://www.cncmachiningptj.com/,thanks!
 3, 4 and 5-axis precision CNC machining services for aluminum machining, beryllium, carbon steel, magnesium, titanium machining, Inconel, platinum, superalloy, acetal, polycarbonate, fiberglass, graphite and wood. Capable of machining parts up to 98 in. turning dia. and +/-0.001 in. straightness tolerance. Processes include milling, turning, drilling, boring, threading, tapping, forming, knurling, counterboring, countersinking, reaming and laser cutting. Secondary services such as assembly, centerless grinding, heat treating, plating and welding. Prototype and low to high volume production offered with maximum 50,000 units. Suitable for fluid power, pneumatics, hydraulics and valve applications. Serves the aerospace, aircraft, military, medical and defense industries.PTJ will strategize with you to provide the most cost-effective services to help you reach your target,Welcome to Contact us ( [email protected] ) directly for your new project.
Link to this article:Proper mold cleaning may be an effective way to solve burrs
Reprint Statement: If there are no special instructions, all articles on this site are original. Please indicate the source for reprinting:Tungusten,Thanks!^^